If you’ve ever run your hands over a ball of soft, plush woolen-spun yarn, you know it’s not just for bulky sweaters or cozy blankets. As someone who’s spent 12 years in the woolen-spun yarn supply business, I’ve lost count of how many dollmakers, craft hobbyists, and even custom toy designers reach out to ask the same thing: How do I turn this warm, fuzzy yarn into tiny, perfect doll clothes? It sounds simple on paper, but between the yarn’s slightly uneven texture (that’s part of its charm, by the way) and the tiny scale of doll clothing, there’s a knack to it that turns a lopsided scarf into a tiny, wearable masterpiece. Over the years, I’ve worked closely with dozens of makers to refine this process, testing hacks, adjusting techniques, and learning what works best with the high-quality woolen-spun yarn I supply. This guide is all that know-how, distilled into steps that work for beginners and seasoned crafters alike, with tips tailored specifically to working with woolen-spun yarn. Woolen-spun Yarn
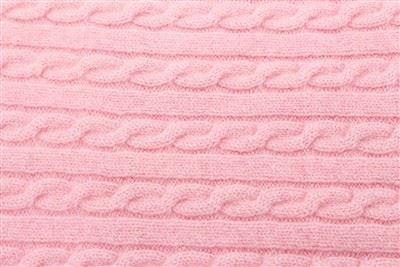
First, let’s get one thing straight: woolen-spun yarn is different from worsted or smooth-spun yarn. Unlike worsted yarn, which is spun with tight, even twists and aligned wool fibers, woolen-spun yarn is created by carding fibers loosely, spinning them with shorter, softer twists, and leaving tiny air pockets throughout the strand. That’s why it’s so fluffy and warm—but that same softness means it can stretch a little more and pill slightly more than other yarns, especially when worked with small needles. For doll clothes, which are often worn, taken off, and played with, this stretch is a huge benefit: tiny woolen-spun sweaters or dresses will fit better than rigid worsted ones, and they’re less likely to pop seams when a kid tugs them on (or when a dollmaker adjusts a tight neckline). But it also means you have to adjust your tension and tools to keep the shape consistent. Don’t let that intimidate you, though—once you embrace that slight unevenness, it’s what makes your doll’s clothes feel handcrafted, not mass-produced.
Before you pick up a needle or a hook, you need to prep your yarn. This is a step that new doll crafters often skip, and it’s where I see most of their mistakes happen. Woolen-spun yarn, even high-quality stuff, can have tiny loose fibers or slight variations in thickness that throw off your stitch count for doll-sized projects. Here’s how I recommend prepping it: first, unwind the yarn into a big, loose ball (avoid a tight yarn ball—you’ll get knots that are impossible to untangle later). Then, grab a spray bottle filled with lukewarm water and a tiny bit of gentle wool soap (plain baby shampoo works too). Mist the yarn lightly, just enough to dampen the surface, not soak it. Gently squeeze out any excess moisture—don’t wring it, that can stretch the fibers permanently—and lay it flat on a towel to air dry for 24 hours. This step, called “blocking the yarn” before you knit or crochet, does two key things for doll clothes: it removes any temporary twists from the skein, so your stitches lay evenly, and it sets the softness of the woolen fibers, so your finished pieces hold their shape longer. I always tell my customers that this 20-minute prep step saves hours of fixing lopsided doll clothes later.
Next, choose your tools. For most doll clothes, you’ll be working with tiny needles or hooks—think US size 1 to 3 knitting needles (2.25mm to 3.25mm) or a size C to E crochet hook (2.5mm to 3.5mm). Why? Larger tools would make the stitches too loose, resulting in doll clothes that are baggy and ill-fitting. With woolen-spun yarn, though, you don’t want to go too tiny, either—needles smaller than size 1 will catch the soft fibers, leading to snags and pilling that will ruin the tiny details like a doll’s sleeve cuffs. I recommend testing your tools on a 2×2 inch swatch first: knit 5 stitches, 5 rows, then measure the width. For most 6 to 8 inch dolls (the standard small fashion doll size), you want a swatch that measures 1 inch for every 5 stitches. If your swatch is wider, go down a needle size; if it’s narrower, go up one. This swatch test is even more important for woolen-spun yarn than for smooth yarn, because its stretch means stitch count can vary more between skeins.
Now, let’s talk about the core steps, starting with a basic doll sweater—this is the most common project new doll crafters tackle with woolen-spun yarn, and it’s perfect for practicing. First, measure your doll properly. I can’t stress this enough: use a soft tailor’s measuring tape to get exact numbers, not guesses. For a standard 7-inch doll, you’ll need: a neck circumference of about 1.5 inches, a chest circumference of 3 inches, and a back length (from neck to where the waist hits) of about 2 inches. Write these numbers down—don’t rely on patterns that say “one size fits all,” because every doll is slightly different, and woolen-spun yarn’s stretch means a generic pattern might be too loose or too tight.
Once you have your measurements, cast on stitches for the back panel. For our 7-inch doll sweater, that’s 15 stitches. Use the long-tail cast on method, which is stretchy and works well with woolen-spun yarn—avoid the tight knit cast on, that will make the neckline too stiff. Knit every stitch for 12 rows (that gives the 2-inch back length), then bind off loosely. Now the front panel: cast on 15 stitches too, and knit 10 rows, so it’s a little shorter than the back (this creates the curved neckline for the doll to fit into). Now, attach the front and back panels together with a whip stitch. I always use a matching woolen-spun yarn for sewing seams—regular cotton thread is too rigid, and it will pull away from the soft wool fibers. When you whip stitch, leave a ½ inch gap at the top of each shoulder for the armholes, and leave the bottom edge open for now.
Here’s where woolen-spun yarn shines for doll clothes: the stretch. The armholes should be slightly smaller than the doll’s arms, because the wool will stretch to fit once you put it on. Once the back and front are sewn, you can weave the bottom edge together, or add a tiny ribbed hem for extra durability. For a ribbed hem, cast on 10 stitches, knit 1, purl 1 for 3 rows, then sew it to the bottom of the sweater—this keeps the hem from curling, which is a common issue with soft woolen yarn.
If knitting isn’t your thing, crochet works just as well, and it’s faster for small projects. For a basic doll dress, start with a magic ring (stretchy, perfect for doll sizes) and work single crochet stitches in a spiral until you have a circle that measures 3 inches (the doll’s bust). That’s the skirt. Then, work 2 more rounds of single crochet to make the waist, then switch to half double crochet for the bodice, shaping it to fit the doll’s torso by decreasing stitches slightly at the waist. For the straps, chain 8 stitches, then slip stitch to attach to the bodice on both sides—again, leave a tiny bit of stretch in the chain, so the straps don’t pull on the doll’s shoulders. The key with crochet and woolen-spun yarn is to use a consistent, loose tension—woolen fibers are soft, so if you pull too tight, your crochet stitches will be tiny and stiff, not plush and cozy.
Now, let’s cover the little details that make woolen-spun doll clothes stand out, and that will make your doll’s outfit look professional. First, trimming and finishing. Woolen-spun yarn sheds a tiny bit, so once you finish your project, gently run a pair of small, sharp scissors along the surface to snip any loose fibers—don’t trim too close, or you’ll make the stitches look uneven. For tiny accessories, like a doll’s scarf or hat, you can use a single strand of woolen-spun yarn, even if you usually use two strands for larger adult projects. A single strand works perfectly for doll scale, and the soft texture makes scarves look extra cuddly.
Pilling is a common concern with woolen-spun yarn, especially for items that will be handled a lot. To prevent pilling in doll clothes, I recommend brushing the finished pieces gently with a soft-bristled toothbrush once they’re blocked—this removes any loose surface fibers before they form pills. You can also add a tiny drop of fabric glue to the ends of any loose yarn tails once they’re woven in, just to keep them from fraying. And if you’re making a gift doll set, keep a tiny spare ball of yarn from the same skein with the outfit—parents or kids can fix small snags or holes later, which makes the outfit last longer.
Another tip that I’ve picked up over years of working with doll crafters is matching yarn to the doll’s purpose. If you’re making doll clothes for a play doll that will be tossed around a lot, use a slightly plied woolen-spun yarn—this has a tiny bit more structure, so it’s less likely to snag or tear. For a collector’s doll, use a single-ply woolen-spun yarn for a more delicate, vintage look that pairs perfectly with tiny lacy details, as long as you handle it gently when working.
Wait, let’s address a common mistake I hear all the time: people trying to use the same patterns they use for adult sweater, just scaled down. That doesn’t work with woolen-spun yarn. Woolen-spun has more drape and stretch than worsted yarn, so a sweater that’s perfect for an adult will be way too baggy when you scale it down. The trick is to reduce stitch count by about 30% for doll projects, not just scale row length. And always block your finished doll clothes—even a tiny doll sweater needs a quick steam block to get the shape right. Hold a steam iron (on the wool setting, no steam) about an inch above the finished piece, let the steam soften the fibers, then gently shape it with your fingers and lay it flat to cool. This sets the stitches, so your doll’s sweater doesn’t stretch out of shape after the first wear.
If you’re new to working with woolen-spun yarn, start small. A tiny doll scarf, a pair of boot cuffs, or even a simple hair scrunchie for a doll is a great first project. Once you’re comfortable with the tension and tools, move up to sweaters or dresses. And don’t be afraid to experiment with colors—woolen-spun yarn comes in soft pastels, bold primary colors, and even variegated hues that look amazing on doll clothes, adding subtle texture that smooth yarn can’t match.
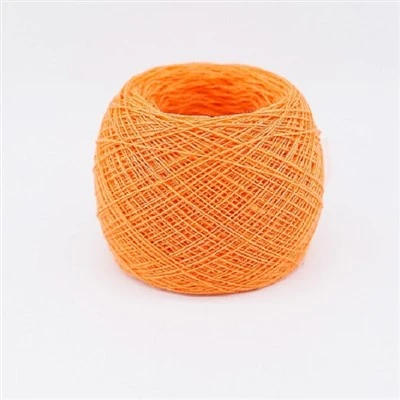
At the end of the day, making doll clothes with woolen-spun yarn is about embracing the imperfection of the yarn, and making tiny, thoughtful pieces that feel special. As a woolen-spun yarn supplier, I’ve seen crafters turn simple balls of yarn into heirloom outfits that get passed down through families, and that’s why I love this process. If you’re ready to start your own project, or you need high-quality woolen-spun yarn tailored for doll crafting, feel free to reach out to discuss your needs, whether you’re a hobbyist making one outfit or a designer working on a custom line of doll clothing.
Fancy Yarn References:
- The Wool Handbook: Fiber to Finished Textiles, 2nd Edition, Textile Institute, 2018, Ch. 5 (Woolen vs. Worsted Spinning Techniques)
- Craft Yarn Council Standard of Practice for Miniature Knitting and Crochet Projects, 2021
- Blocking Textiles: A Practical Guide for Hobbyists, Smith, L., St. Martin’s Press, 2019, Ch. 3 (Blocking Yarn for Small-Scale Textiles)
- Doll Clothing Construction: Patterns and Techniques for Plush Yarns, Carter, M., Craft Books International, 2020, Ch. 4 (Working with Woolen-Spun Yarn for Miniature Apparel)
Huangshan Aotai Textile Co., Ltd.
As one of the most professional woolen-spun yarn manufacturers and suppliers in China, we’re featured by quality products and good service. Please rest assured to wholesale bulk premium woolen-spun yarn in stock here and get quotation from our factory. We also accept customized orders.
Address: Development Zone, Bei’an Town, She County, Huangshan City, Anhui Province
E-mail: aotaifangzhi2007@163.com
WebSite: https://www.cn-aotai.com/
